

Summary
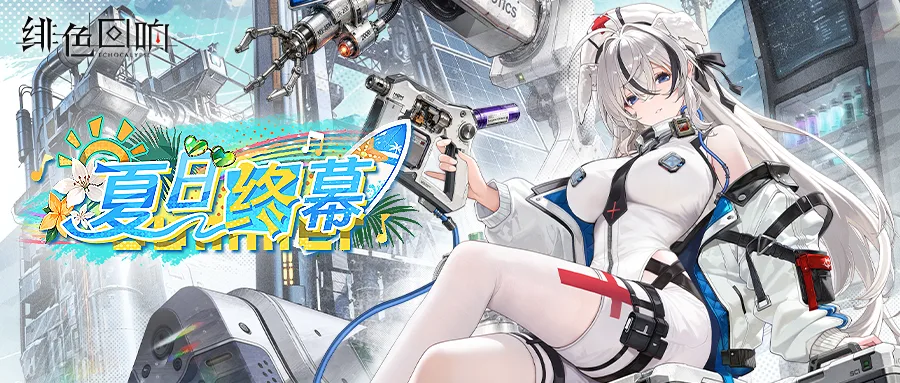
Sana is a Water-element MR Resonator in Echocalypse: Scarlet Covenant. She is not a DPS and not just a healer: Sana is Emergency Control — a Bifrost military doctor whose job is to postpone defeat. Her Medical Kit protects the front line from the start of battle, Vital Signs Monitoring holds frontliners who should have fallen in a Near-Death state, and Emergency Surgery pulls them back into the fight. This guide compiles her kit from the JP community wiki's per-star tables and CN guides, clearly marking which numbers are certain at low stars and which are still max-level references.
Profile
Scroll to see every column.
| Aspek | Penjelasan |
|---|---|
| Name | Sana / サナ / 萨娜 |
| Rarity | MR |
| Element | Water |
| Faction | Bifrost / Rindong (凛冬) |
| Role | Emergency Control / Defensive Support / Field Medic |
| Evolution prototype | Newfoundland dog |
| Birthday | July 10 |
| Height / weight | 165 cm / 55 kg (JP wiki) |
| JP voice | Yuka Hiiragi (柊優花) (JP wiki) |
| Exclusive weapon | Smart Medical Mechanical Arm (CN: 智能医疗机械臂); an SR "Prototype" version comes from the event |
No matching characters. Try another name.
Sana contributes through protection against attack chains, handling allies who should have fallen, and reducing enemy attack efficiency. The Water damage on her Basic/Active/Critical is not the main reason to pick her — she is a survival anchor, not a DPS. Small details, item names, and percentages may differ between the CN, JP, and Global versions.
Lore: The Frontline Doctor
Sana comes from a border region and grew up in the Stork residential area. Since childhood she had a habit of looking after her friends and watching over the people around her. Her harsh environment kept her from idealizing war; to her, caring for someone is not a character decoration but a duty to complete. When those around her chose to join the military, Sana worried for their safety — she took the military academy exam, passed, and became a Bifrost military doctor. She is known for her stubbornness: however bad the battlefield conditions get, Sana refuses to give up while a chance of rescue remains.
Marsha, Sana's childhood friend, once saw war as a path to a better future. Sana never shared that romantic view — she entered military school not to chase honor, but to stay close and help her friend. Her fears came true: Marsha struggled to adjust on a real battlefield, was badly wounded, and was saved by Sana. After many conversations, Marsha chose to retire from the military while Sana stayed on duty. Sana's knowledge of Echo Crystal-related illness also grew through self-study and clinical experience: a figure known as the Reaper of Horeas came to her asking for help treating children afflicted by crystal corrosion, and Sana accepted because it matched her life principle — if there is a chance to help, she acts.
Core Mechanics
Medical Kit & Vital Signs Monitoring
Medical Kit is an early-battle protection buff for the front row, with longer duration on Water targets. Vital Signs Monitoring is the Passive Lv3 effect that prevents frontliners other than Sana from being eliminated by fatal damage during the first 3 turns: a protected unit enters the Near-Death state — remaining in battle but unable to act and untargetable by normal attacks; the protection ends if all other units are eliminated. Emergency Surgery on her Active can then release one unit from that critical state and restore its HP.
Sana's Kit
Sana's four skills form a layered rescue system. The Basic and Passive numbers below come from the JP wiki's tables; each star row shows the highest skill level opened at that investment point. Max-level Active and Critical numbers come from community transcriptions and CN guides — treated as developed-kit references, not values for every star.

Basic — Medical Disinfection
Sana physically strikes the enemy front row with Water element using her medical arm, restoring 25 Critical Gauge/Pneuma.
- Lv1 (0★): 88% ATK Water Physical DMG to the enemy front.
- Lv2 (unlocks at 1★): 97% ATK; still without the rear elemental bonus written on Lv3.
- Lv3 (unlocks at 4★): 129% ATK; rear Elemental DMG +10% for 2 turns, plus an extra +8% for rear Water.
- Lv4 (unlocks at 6★): 157% ATK; rear Elemental DMG +15% for 2 turns, plus an extra +10% for rear Water.
Players who only own a 0★ Sana must not count the 15% + 10% backline Water buff — that value is only listed on Basic Lv4, which opens at 6★.
Passive — Battlefield Angel
- Lv1 (0★): Medical Kit to the front for 2 turns (3 turns for Water). Elemental Crit Resistance +10%. When hit by non-active damage, the JP text has Sana's HP recover by 5% Max HP; max twice per turn.
- Lv2 (unlocks at 1★): Elemental Crit Resistance +20%. Whole-team non-active damage mitigation +10%, with an extra +5% for the Kit user. Recovery listed at 8% of Sana's Max HP; max 3 times per turn.
- Lv3 (unlocks at 3★): Elemental Crit Resistance +30%. Whole-team non-active mitigation +20%, Kit bonus +10%. Recovery 10% of Sana's Max HP; max 5 times per turn. Vital Signs Monitoring for 3 turns + Sana's Final DMG Reduction +30%.
Active — Emergency Surgery
High-level kit transcriptions have Sana dealing about 319% ATK Water Physical Damage to the enemy front row, restoring 50 Pneuma, and granting a Shield worth 20% of Sana's Max HP to front-row allies. Its component effects on the developed kit:
- Emergency Shield: a Shield for the front row; the max-level value is reported at 20% of Sana's Max HP.
- Compassion / Pity: the enemy target receives an ATK penalty and a chance for its Basic Attack to fail.
- Humanitarian Principle: a stronger debuff — ATK/Crit/Crit DMG down, plus a failure chance for both Basic Attacks and active skills.
- Rescue Near-Death: one random ally in the Near-Death state can be released from it and restored; CN guides report a 50% HP recovery.
- If no Near-Death exists: CN guides report an alternative heal of about 30% of Sana's Max HP to the front row.
Critical — Full-Body Remodeling
The documented unlock path: Lv1 at 0★, Lv2 at 2★, Lv3 at 5★, Lv4 at 7★. In CN guides evaluating a high-investment Sana, her Critical helps the two lowest-HP allies, removes up to 3 attribute debuffs from the front row, and can grant a bonus Shield to Water allies based on Sana's Max HP.
- Priority sustain: helps low-HP allies keep fighting until the next control cycle.
- Front-row dispel: helps remove debuffs that weaken Water frontliners; not guaranteed to clear every debuff class.
- Physician Heals Thyself: a buff on the highest-ATK backline ally — raising heal received and enabling recovery from the damage they deal; its end of duration also restores HP.
Star Comparison: 0★, 3★, 5★, 7★
- 0★ — Basic Medical Kit: Basic Lv1 88%, Passive Lv1 (Crit Resistance +10%), Critical Lv1. Weakness: Vital Signs Monitoring is not open; do not expect Sana to hold fatal bursts the way 7★ videos show.
- 3★ — Emergency Control opens: Passive Lv3 unlocks Vital Signs Monitoring, larger recovery and mitigation; the front row becomes much harder to eliminate in the first 3 rounds. This is the main reason to bring Sana in Arena/PvP with Clara and Lyora.
- 5★ — Better skill access: Critical Lv3 and Basic Lv3 open; the Basic starts providing rear Elemental DMG +10% plus +8% for Water. The full Critical Lv3 coefficients and certain Active numbers are not available in open sources.
- 7★ — Maximum development: Critical Lv4 and Basic Lv4 (rear +15%, Water +10%); the high-level kit pressures enemies more completely. 7★ is not mandatory for every player — investment efficiency depends on your modes and built team.
Investment: When to Stop
If your goal is only collecting characters or completing a Water roster, a 0★ Sana still has Medical Kit. But for the fatal-situation rescue role, CN analysis treats 3★ as the minimal functional target. After that, upgrade value must be weighed against the cost of developing Clara, Lyora, Scarlett, or her weapon.
Scroll to see every column.
| Situation | Decision |
|---|---|
| F2P & thin Water roster | Prioritize Clara + a tank and one functional support before full-starring a single character. |
| You already own a Water core | A 3★ Sana gives a more substantial gameplay change than chasing damage coefficients alone. |
| Competitive play | 5★/7★ is worth evaluating after weapon, Oath, and positioning are secured. |
| PvE boss races | Compare clear times; an extra support sometimes loses efficiency to a DPS slot. |
No matching characters. Try another name.
Weapon, Oath, and Radiance
Sana's exclusive weapon is the Smart Medical Mechanical Arm (CN: 智能医疗机械臂). According to CN evaluations, the 0★ weapon can provide defensive utility after an ally is eliminated; weapon investment grows toward stronger Shield effects, a cleanser for front Water, and at high augment tiers added protection for allies around Sana. The CN event announcement also offers an SR prototype with lower stats that can still activate her resonance skill — event rewards differ by region. Do not equate weapon stars with character stars.
Her Oath Skill is reported as Devoted Love (CN translation): after Sana falls, Water allies receive a permanent +20% Water DMG and one enemy backline unit receives Frozen for 2 rounds; if Frozen is immunized, there is a conditional True DMG alternative. This effect requires the Oath — do not count it as standard 0★ kit. Her Radiance, Angel's Heart, per the JP wiki grants the whole team DEF +10% / +15% / +20% during the first 3 rounds depending on Radiance level; Radiance unlocks are a separate system from star-level skill leveling.
Build & Positioning
Scroll to see every column.
| Priority | Stat / reason |
|---|---|
| 1. HP% / Max HP | Shields and several heals on the developed kit scale with Sana's Max HP. |
| 2. Final DMG Reduction / DEF | Survive bursts so Sana does not fall before a Rescue. |
| 3. Elemental DMG Reduction | Element-based enemies have a harder time finishing the support. |
| 4. Resistance / anti-control | Reduces the risk of Sana herself being unable to cast when needed. |
| 5. ATK / Elemental DMG (optional) | Not a priority over HP and sustain in the healer role. |
No matching characters. Try another name.
CN guides cite the defensive sets Stagnation (凝滞) / Heavy Armor and Revival as starting points, including the Claw and Adaptation components; single items such as Blood Crystal Coat and Energy-Devouring Blade appear as alternatives in community references — module name translations may change by region. Advanced guides suggest slot 5 (middle back row): Sana does not consume one of the front-row slots entitled to Vital Signs, is safer from front-focused damage, and at high weapon tiers covers nearby units well. Stacking ATK without HP often makes Sana fail to save the team — use PvP/PvE battle data to see whether Sana falls, fails her Critical, or the front line loses its buffs, and do not build her too aggressively.
Water Lineups
A. Pure Water Control
Front row: Lyora, Rei, Baiying. Back row: Clara, Fanfan, Sana. A CN framework for sustain, healing/shield, and Water buff coverage. Note that character names and availability differ by region.
B. Frontline Anti-Burst
Front row: Lyora, Scarlett, Baiying. Back row: Clara, Fanfan, Sana. An alternative when you need extra control and front damage reduction — three front units maintain the Near-Death cycle and give Clara room.
C. Mixed Water Flex
Front row: Lyora, Scarlett (flexible tank). Back row: Clara, flexible carry, Sana. If you do not own every Water character, use slot functions rather than forcing names — keep the Water Coordinator and Sana as the backline medic, and adjust the tank/carry slots to your roster.
Gameplan order: Clara provides damage/elemental synergy, Lyora props up the front, and Sana keeps near-dead members alive. Clara is the only Coordinator in these compositions — do not assume slot order automatically equals skill order if SPD and settings change. Synergy partners: Clara (Water Coordinator, core partner), Lyora (frontline mitigation and Shields that extend rescue time), Scarlett (extra Water control and front-row holding), and Fanfan/Baiying/Rei as alternative Water units. CN secondary sources also list Links with Clara (+ATK 18%), Asly (+Armor 18%), Zoya (+Resistance 18%), and Elisa & Tesicca (+HP 25%) — these are CN community/region claims; check Link availability and prerequisites on your account before counting them as active bonuses.
Rotation & Weaknesses
- Before battle: place Sana in the back, three different allies in front, Medical Kit active on the front; make sure HP/weapon are sufficient to withstand repeated non-active damage, since its trigger differs from direct active damage.
- Round 1: identify enemies with opening attacks and keep Sana from early focus.
- Fatal damage: at 3★, eligible frontliners can enter Near-Death but lose their actions until they leave that state.
- Rescue & recover: use Emergency Surgery when available to save one ally and preserve your living unit count.
- Sana gets controlled before casting: add external resistance/cleanse and avoid over-exposed placement.
- Enemies hit the back line first: adjust positioning and Shield sources; Sana's rescue skills are mainly for the front.
- The enemy kills all active units quickly: Near-Death does not automatically guarantee victory; you need a carry that can still act.
- The team lacks boss damage: swap one defensive unit for a DPS based on clear-time tests.
Sana vs Scarlett and Lyora
All three overlap in Water roles, but their main functions are not identical. Mechanic pillars: Sana = rescue + Near-Death, Scarlett = Water frontline control, Lyora = mitigation/Shield. Ideal positions: Sana in the back (slot 5), Scarlett and Lyora in front. Best scenarios: Sana for anti-burst and fatal rescue; Scarlett for front control and suppressing enemy damage; Lyora for continuous team physical durability and stability. Star priorities: 3★ is significant for Sana, 3★ is important for Scarlett's link, Lyora depends on the server's skills. Pick Sana if your losses often come from frontliners falling before Clara or your backline DPS can maximize damage; pick Scarlett if you lack front-row control and self-sustain; Lyora stays important when you need continuous defense that depends less on rescue timing. This is analytical advice, not a definitive cross-server ranking.
Verdict
Pull conclusion: a 3★ Sana is the clearest breakpoint for rescue utility; 5★ and 7★ fit better after your Water team and main builds are stable. The circulating T0.5/T1 labels are CN community assessments, not official win statistics. Sana is used to postpone defeat and cut enemy carry actions, not to finish bosses alone — and in that role she shines.



Guide discussion
Have a question or an update? Share it with other readers.
Checking your AizaStore session…
Your comments
Reader comments